Unlocking Financial Freedom: A Step-by-Step Guide to Creating a GCash Account
In today’s digital age, managing your finances has never been easier, thanks to innovative mobile payment solutions like GCash.
Whether you’re a seasoned user or just getting started, this step-by-step guide will walk you through the process of creating your GCash account, empowering you to take control of your financial transactions with ease.
Key Takeaways Table:
| Step | Action |
|---|---|
| 1. | Download the GCash app from the App Store or Play Store. |
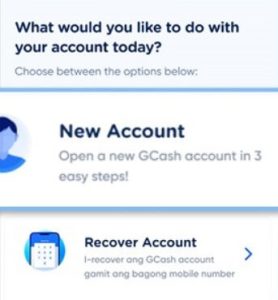
| 2. | Open the app and register for an account. |
| 3. | Provide the necessary personal information. |
| 4. | Verify your identity through the app’s verification process. |
| 5. | Set up your MPIN for added security. |
Getting Started: Downloading the GCash App
To embark on your journey towards financial empowerment, the first step is to download the GCash app from either:
The App Store (for iOS users)
The Play Store (for Android users).
Step 1: Registration
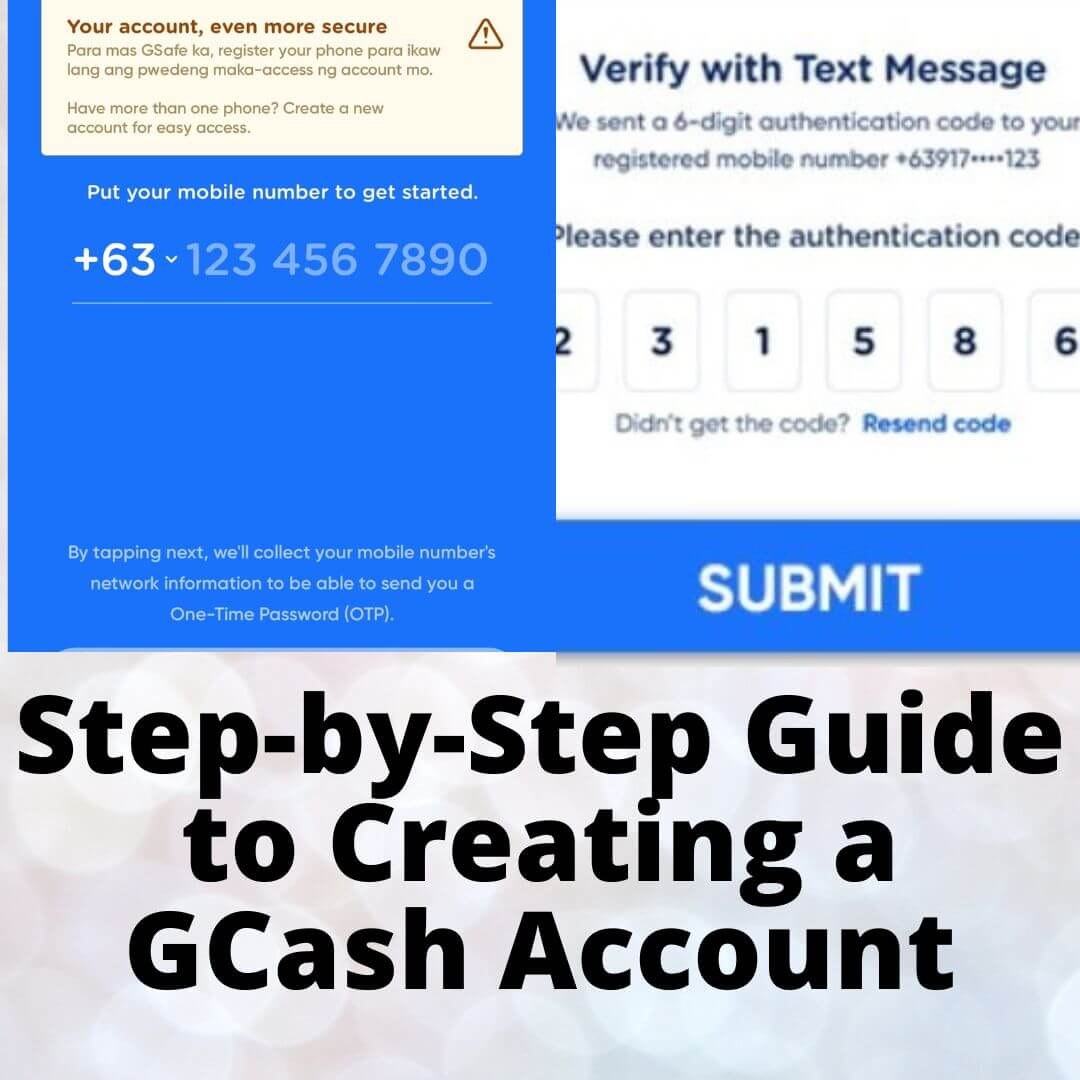
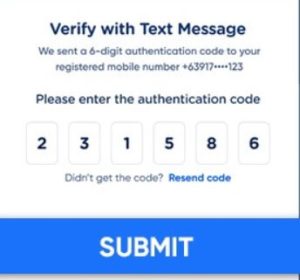
Once the app is successfully downloaded and installed on your device, open it to begin the registration process. You’ll be prompted to provide your mobile number to start the account creation process.

Step 2: Personal Information
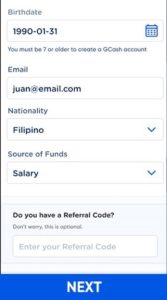
After entering your mobile number, you’ll need to provide some basic personal information, including your full name, birthdate, and email address. Ensure that the information you provide is accurate to avoid any issues during the verification process.

Step 3: Identity Verification
To comply with regulatory requirements and ensure the security of your account, GCash will ask you to verify your identity. This typically involves submitting a photo of a valid government-issued ID (e.g., driver’s license, passport) and taking a selfie for facial recognition purposes.
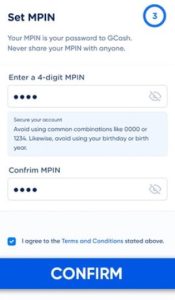
Step 4: Setting Up Your MPIN
Once your identity is successfully verified, you’ll need to set up a Mobile Personal Identification Number (MPIN) for your GCash account. This serves as an added layer of security and is required whenever you make transactions or access certain features within the app.
Step 5: Exploring GCash Features
With your account set up and ready to go, take some time to explore the myriad features and services offered by GCash.
From cashless payments and money transfers to bill payments and online shopping, GCash provides a convenient and secure way to manage your finances right from your smartphone.
By following these simple steps, you can create your GCash account and unlock a world of financial possibilities at your fingertips.
Embrace the convenience, security, and flexibility that GCash offers, and take control of your financial future today.
Next Steps:
Now that you’ve created your GCash account, delve deeper into its features and functionalities to maximize its potential.
Stay tuned for our upcoming articles, where we’ll explore advanced tips and tricks for making the most out of your GCash experience.